

The Asset Intelligence Report (Pro + AIE)
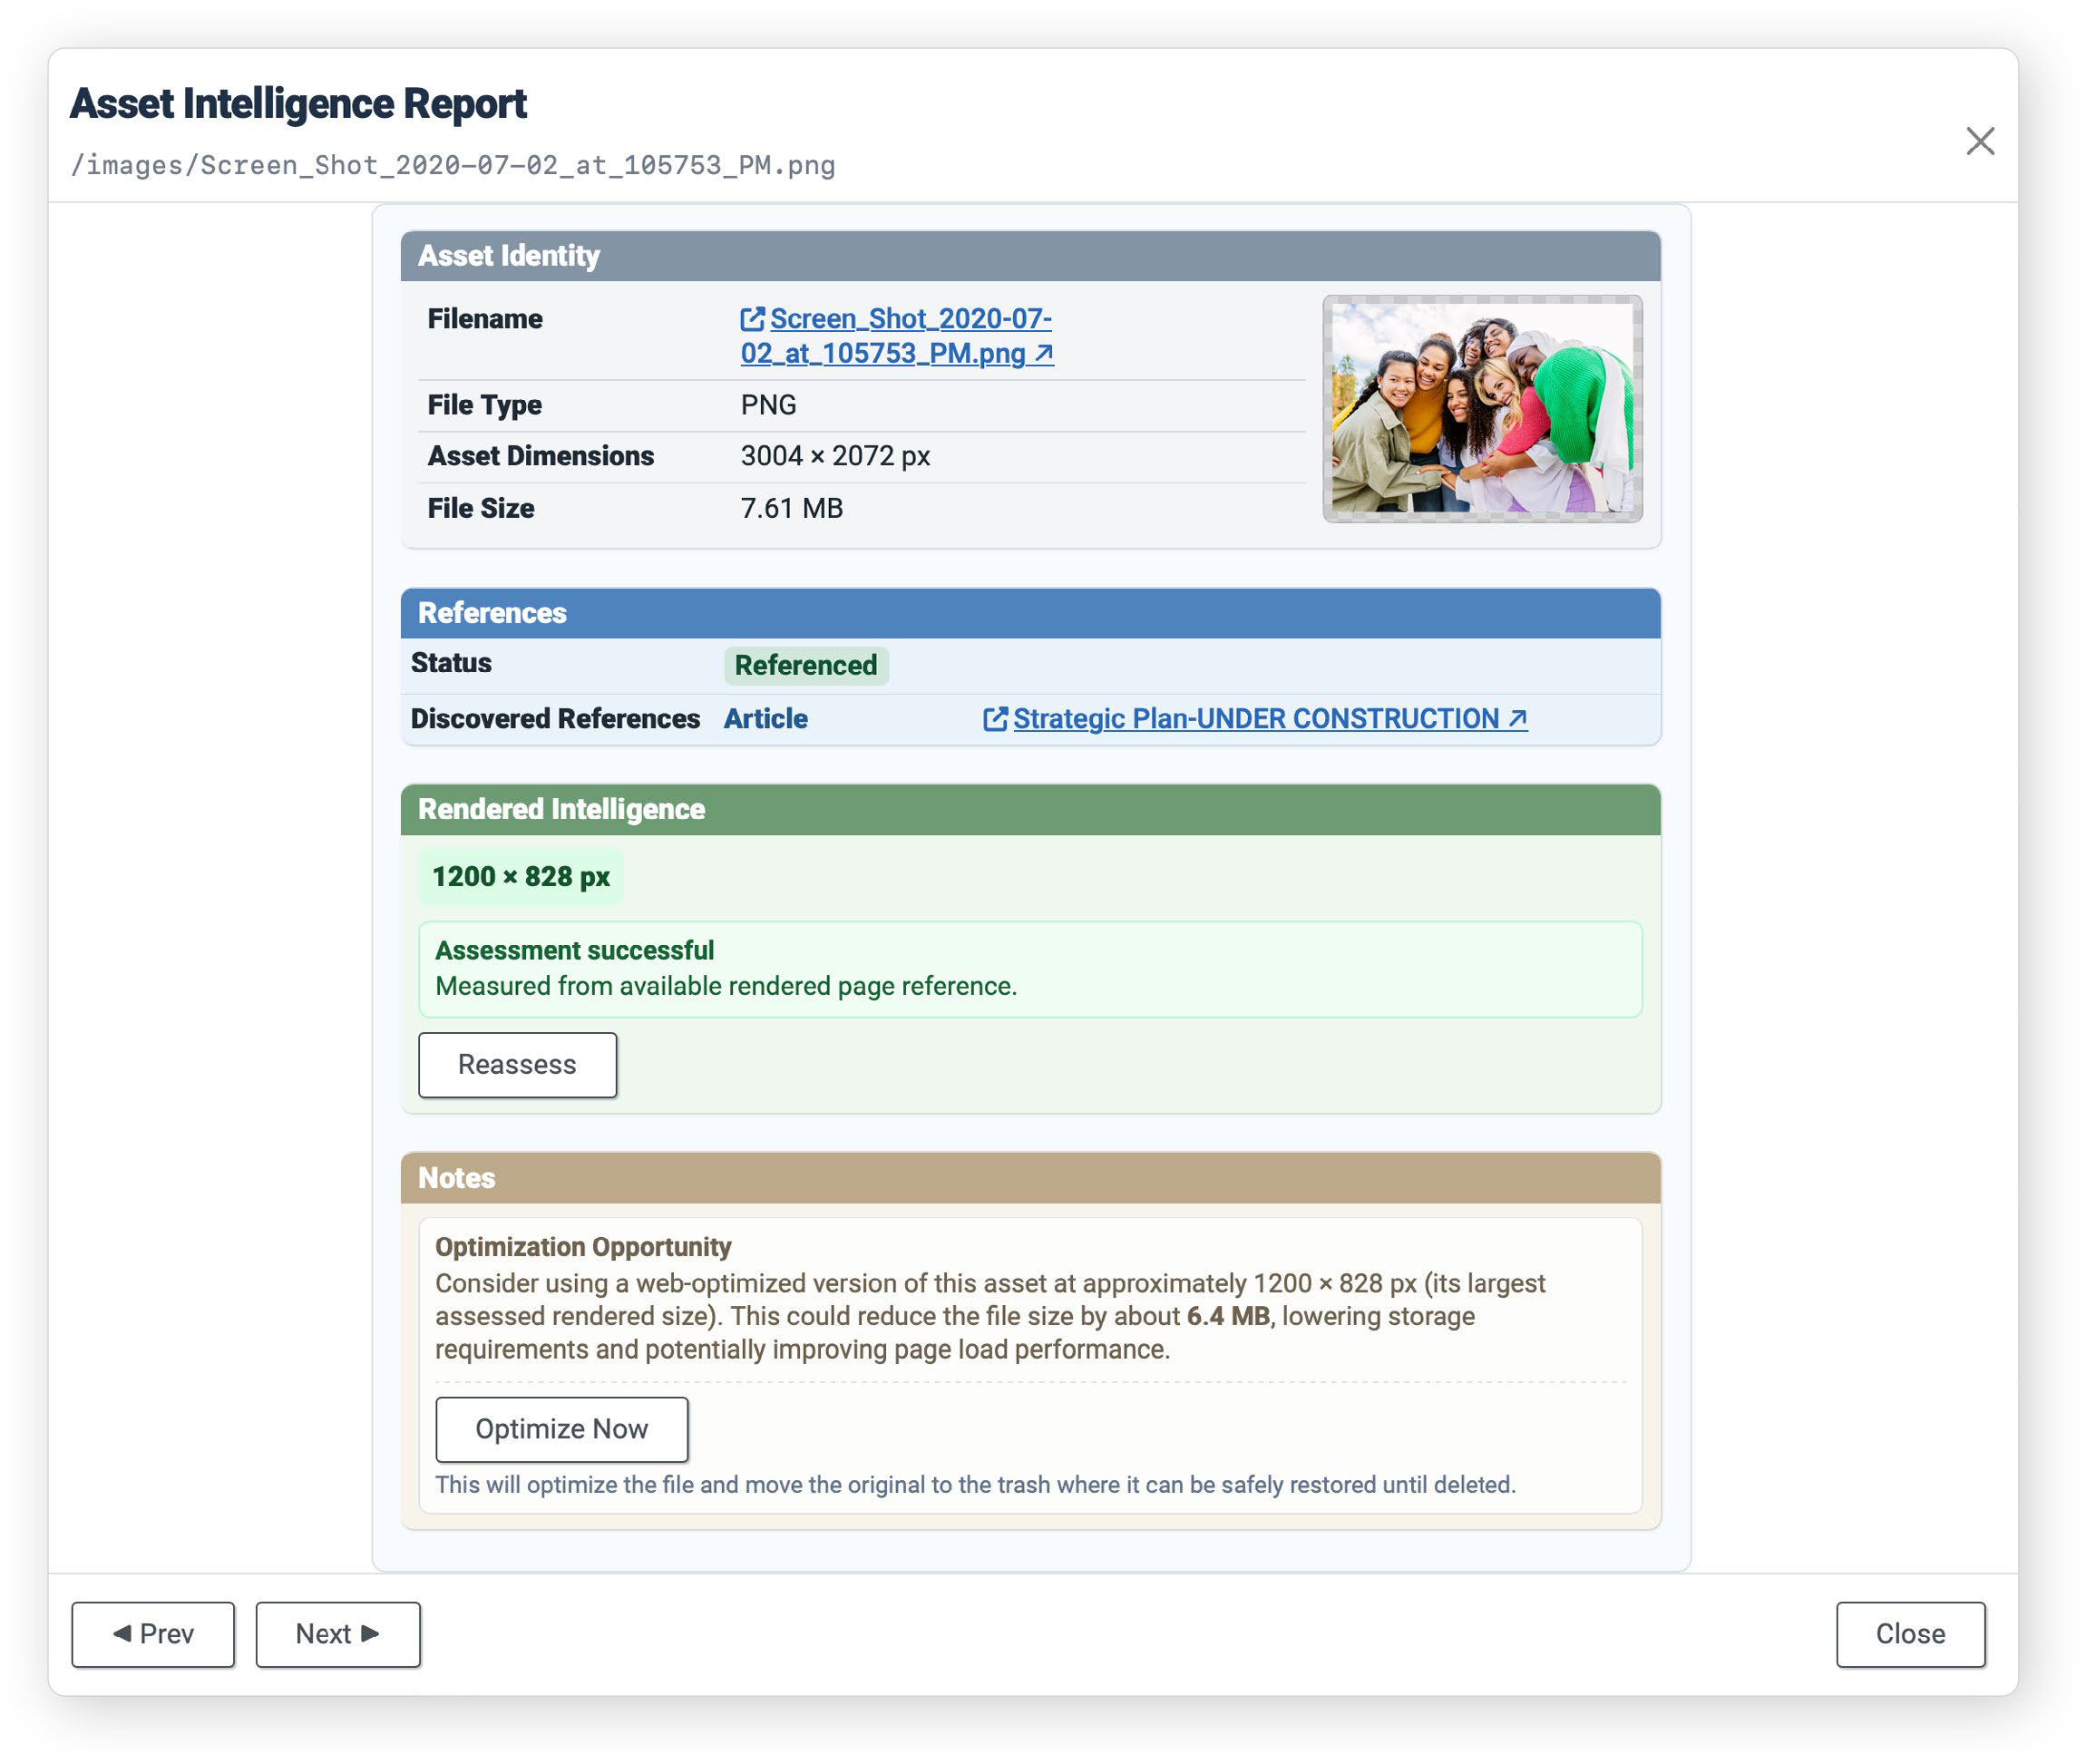
When the Asset Intelligence Engine™ (AIE) is installed, clicking an asset in the Digital Asset Inspector™ opens its Asset Intelligence Report — a detailed, single-asset breakdown of what MAP knows about that file. The report opens as a dialog, with the asset's file path shown as a subtitle right under the "Asset Intelligence Report" title, and a close (×) button in the top-right corner.
Asset Identity
The first panel covers the basic facts about the file — information you're probably already familiar with from Joomla's own Media Manager:
- Filename — a clickable link (with an external-link icon) that opens the file directly.
- File Type — the file format, e.g. PNG.
- Asset Dimensions — the file's actual, original pixel dimensions (e.g. 3004 × 2072 px). This is the size of the file as stored, not necessarily the size it's displayed at.
- File Size — the file's size on disk (e.g. 7.61 MB).
- File Path — is displayed at the very top of the report window.
A thumbnail preview of the asset appears to the right of these details so you can visually confirm you're looking at the right file.
References
This panel shows what MAP's Analyzers discovered about where the asset is used:
- Status — a badge showing Referenced (green) if any Analyzer found a supported relationship to this asset, or a corresponding Unreferenced/Reserved status otherwise, matching the categories used in the Digital Asset Inspector.
- Discovered References — a list of every place the asset is used, as discovered by your active Analyzers. Each entry shows the type of item (e.g. Article) and a live link (with an external-link icon) straight to that item, so you can jump directly to the page, module, or record referencing the asset.
Rendered Intelligence
This panel is where AIE tries to determine the asset's actual displayed size — as opposed to its raw file dimensions from Asset Identity above. It corresponds to the Auto-assess Dimensions option in the Digital Asset Inspector.
- At the top, the measured rendered size is shown (e.g. 1200 × 828 px) — this is how large the image actually appears on the page(s) that reference it, not how large the source file is.
- Below that, a status message explains how the measurement was obtained. Assessment successful means AIE was able to measure the size directly from an available rendered page reference. If AIE can't find a renderable reference to measure from, this panel will instead explain that assessment wasn't possible, and no size recommendation can be made.
- Reassess — re-runs the measurement. Use this after you've changed how or where the asset is displayed, or after editing the page it appears on, so the report reflects current reality rather than a stale measurement.
Notes
When Rendered Intelligence and Asset Identity together suggest an asset is larger than it needs to be, AIE surfaces an Optimization Opportunity note here. It states the recommended web-optimized size (the asset's largest assessed rendered size across all its references) and estimates how much smaller the file could be at that size — for example, "Consider using a web-optimized version of this asset at approximately 1200 × 828 px (its largest assessed rendered size). This could reduce the file size by about 6.4 MB, lowering storage requirements and potentially improving page load performance." This note only appears when there's a meaningful gap between the original file size and its actual rendered use; if the asset is already sized appropriately, this section won't flag anything.
Optimize Now
If an Optimization Opportunity is shown, an Optimize Now button lets you act on it immediately: AIE resizes the file to the recommended dimensions and saves a copy of the original, full-size file to the MAP Trash before writing the optimized version at the same path. As with any file in the Trash, that original copy remains recoverable until you permanently empty the Trash — useful not only if something looks wrong after optimizing, but also if you later discover another use of the asset (one your Analyzers didn't catch) that actually needed the larger size. If the optimized write itself fails for any reason, nothing is changed: the live file is left exactly as it was, so a failed attempt never results in a missing or broken image.
Navigating Between Reports
At the bottom of the dialog, Prev and Next buttons let you step through the Asset Intelligence Reports for other assets in your current list without closing the dialog, and Close returns you to the Digital Asset Inspector.